iMac Intel 24" EMC 2111 IR Board Replacement
ID: 5194
Description: Use this guide to replace your iMac's IR board.
Steps:
- Loosen the two Phillips screws securing the access door to your iMac.
- Both screws remain captive within the access door.
- Remove the access door.
- Remove the following screws along the lower edge of your iMac:
- Three 6 mm T8 Torx screws
- One 8 mm T8 Torx screw
- Lay your iMac stand-side down on a flat surface.
- To lift the front bezel off the iMac, simultaneously:
- Use your thumbs to press in the RAM arms and hold the iMac down.
- Use your index fingers to pull the small bridge of material on the front bezel toward yourself.
- Pull the front bezel up with your index fingers.
- Once the small bridge of material has cleared the RAM arms, lift the front bezel by its lower edge just enough to clear the bottom edge of the rear case.
- Lift the front bezel off the rear case and rotate it away from the bottom edge of the iMac, minding the camera and microphone cables still attached to its upper edge.
- The third picture shows the top front bezel brackets and their slots cut into the top edge of the iMac's rear case.
- Do not completely remove the front bezel, as it is still attached by the camera/microphone cables.
- If necessary, remove the strip of tape covering the microphone cable connector.
- The microphone connector is located near the inside of top edge of your iMac.
- Disconnect the microphone cable.
- Disconnect the camera cable by pulling its connector away from the socket on the camera board.
- The camera cable connector and socket are delicate and easily bent. Remove with caution.
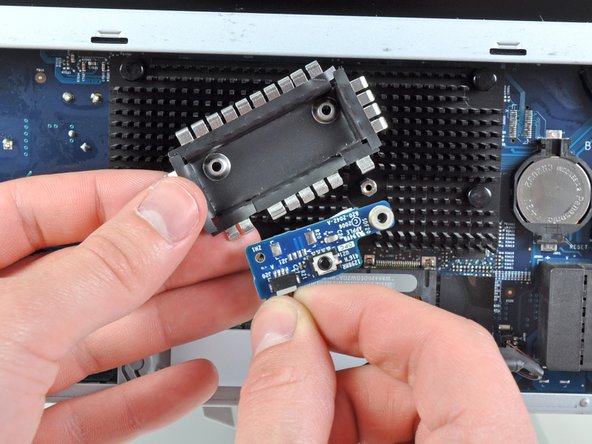
- The IR board is located above the RAM modules socket, near the lower, center portion of the iMac.
- Remove the single T6 Torx screw securing the small IR board.
- Pull the small IR board slightly away from the iMac and disconnect its cable.
- Set it aside.
- Remove the remaining T6 Torx screw securing the other IR board to the logic board.
- De-route the IR cables from the metal shield behind the IR board and remove the shield from the iMac.
- Disconnect the second IR board and remove it from the iMac.