Jazz HDV178 Camcorder zoom switch Replacement
ID: 4981
Description: This will show you how to get the zoom switch...
Steps:
- On the back of the camcorder, the side opposite of the flip-out screen, there is a section of grooved plastic with a small arrow.
- Press down on the grooved plastic with your thumbs.
- Push the back cover in the direction indicated by the small arrow on the grooved plastic. The back cover should slide right off.
- Once you have the back cover off, the camcorder should look like this.
- Look on the battery for a model number to assure that you acquire the correct replacement part.
- The camcorder model number is located in the red box. Verify that you have a Jazz HDV178.
- Take the battery out by pulling up on the bottom of the battery. You should be pulling from the side of the camera where the wrist strap is attached.
- Remove the camera mount by unscrewing the 4.5 mm screw in the hole.
- This is the bottom of the camcorder near where the wrist strap connects.
- Remove the 4.5 mm screw located near the battery slot.
- Break the glue that attaches the lens cover to the camcorder by sliding the plastic prying tool beneath the circumference of the part.
- After the glue is broken, remove the lens cover.
- Use a small plastic pry tool to gently pry off the silver strip on the top of the camera.
- Make sure to run the tool under the outline of the strip as you pry it off so the plastic does not snap.
- Locate the side of the camcorder beneath the lens and on the opposite side of the wrist strap.
- Remove the silver strip using the same process as the previous step.
- Remove the two 4 mm screws that were hidden under the cover.
- Pry off the rubbery cap, which covers the buttons. Use the same process as the previous two steps.
- Slide your prying tool underneath the entire cover to ensure that the glue breaks cleanly and the cover does not snap.
- Remove the three combined buttons so they are not misplaced.
- Using a firm hold on both sides of the camcorder, gently pull apart the two halves. Pressure should be evenly distributed across the entire device.
- If the camcorder does not come apart easily, double check that all of the screws are removed. Return to the previous steps for screw removal if you find a screw that is still attached.
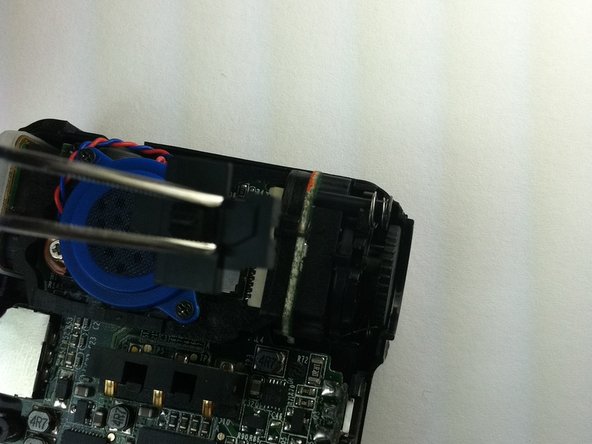
- Before removing the switch, note its position for easy reassembly.
- Use tweezers to lift the switch off of the pin.
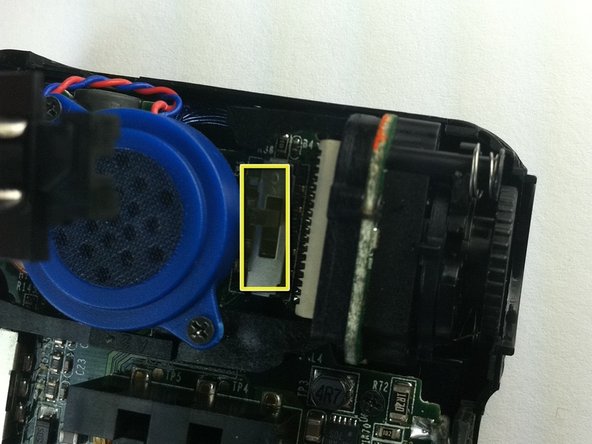
- Inspect the pin's motion.
- If the pin works properly, the zoom switch may need to be replaced.