1998-2002 Honda Accord Distributor Rotor Replacement
ID: 3636
Description: Use this guide to replace your Honda Accord's...
Steps:
- Before disconnecting the spark plug wires, be sure to trace their orientation from the individual cylinders back to the distributor cap.
- The cylinders are ordered from left to right when viewing the engine from the front of the car, with cylinder #1 being closest to the passenger side of the vehicle.
- Mark the order of the spark plug wires on the new distributor cap with a silver sharpie marker -- it will make reinstallation much easier.
- Disconnect the four spark plug wires from the distributor cap by pulling their connectors straight away from the sockets on the distributor cap.
- It may be helpful to slightly twist the wires as you pull them.
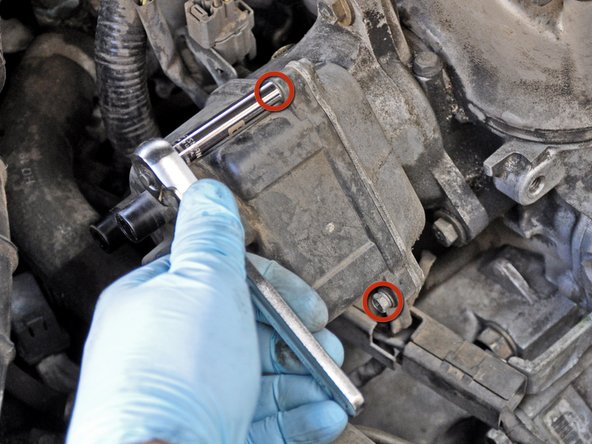
- Use a 1/4" drive, 8 mm deep socket to remove the three hex bolts securing the distributor cap to the engine.
- The position of the third bolt is not visible in the second picture.
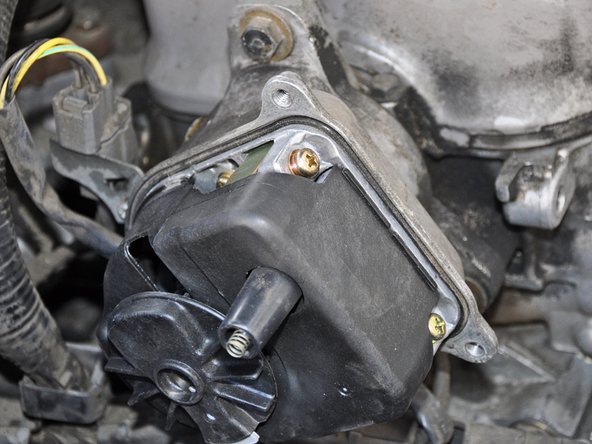
- Pull the distributor cap away from the engine and set it aside.
- Use a dental pick or a small screwdriver to gently remove the D-shaped o-ring around the distributor cap flange.
- Install a new o-ring in the seal recess, making sure that it is sitting flush against the flange.
- Remove the single #2 Phillips screw securing the distributor rotor to the shaft.
- Pull the distributor rotor straight off its shaft, being careful not to rotate the shaft as you remove it.
- When installing the new distributor rotor, press it onto the shaft with the screw holes aligned axially.