Sanyo VPC S1275 LCD Screen Replacement
ID: 2322
Description: Use this guide to gain entry to LCD screen and...
Steps:
- Place your thumb on the right side of the camera over the battery door.
- Slide the battery door to the right until the door lifts up.
- Remove and recycle old batteries.
- Remove the following six screws using the Phillips #00 screwdriver:
- Two screws on the left side of the camera.
- Two screws on the right side of the camera.
- Two screws on the bottom of the camera.
- Open the battery slot on the bottom of the camera by sliding the door to the right.
- Remove the single 4 mm screw on the bottom right using the Phillips #00 screwdriver.
- Insert a spudger in the seam at the bottom of the camera.
- Gently separate the rear case from the front of the camera.
- This step is only needed for the case and logic board replacement
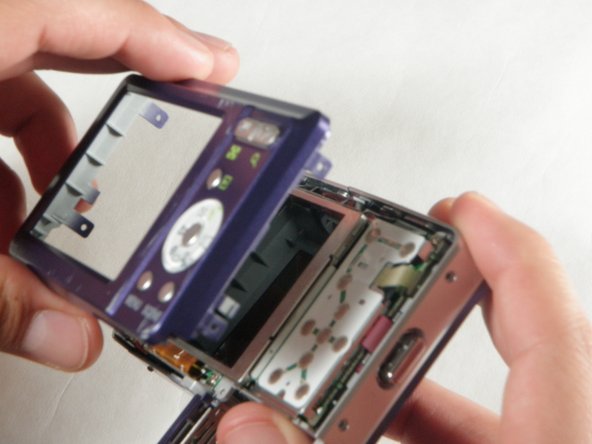
- Using the Phillips #00 screwdriver, remove the single screw attached to the front casing in the top left corner. The front case should easily separate.
- This step is only needed for the case replacement.
- Using the Phillips #00 screwdriver, remove the screw on the inside of the battery door.
- Slide the battery door off of the hinge.
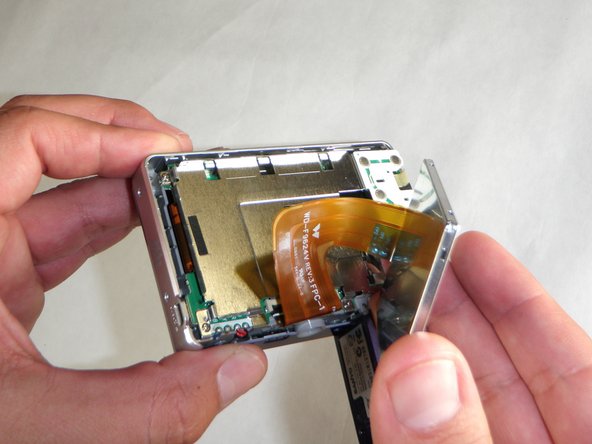
- Using the spudger, carefully lift up the LCD screen, making sure to keep the ribbon cable intact.
- Place the LCD screen on a non-abrasive surface.
- Using the spudger lift the black flap up to release the ribbon cable.
- The LCD screen will now be completely detached from the camera.