Sony DVP-NS715P Teardown
ID: 1218
Description: This is my current DVD Player that I use all...
Steps:
- What you should do first is have the DVD Player plugged in and eject the tray to the open position.
- Then gently pry off the silver face of the tray.
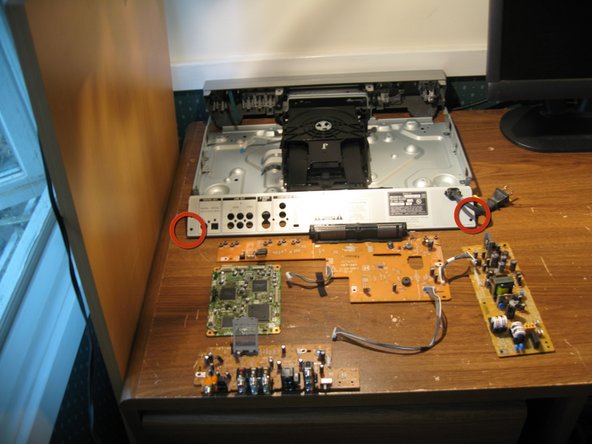
- Unscrew the two screws on either side of the unit.
- Next, Unscrew the three screws on the back of the Unit circled in black.
- Then, Detach the outer casing by sliding it off pulling back.
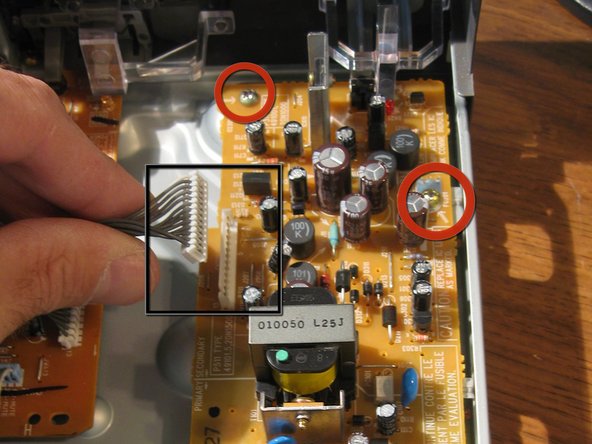
- Detach the power cable that connects to the power Supply Board.
- Then Remove the Ribbon Cable Connector from the power supply (labeled in Black)
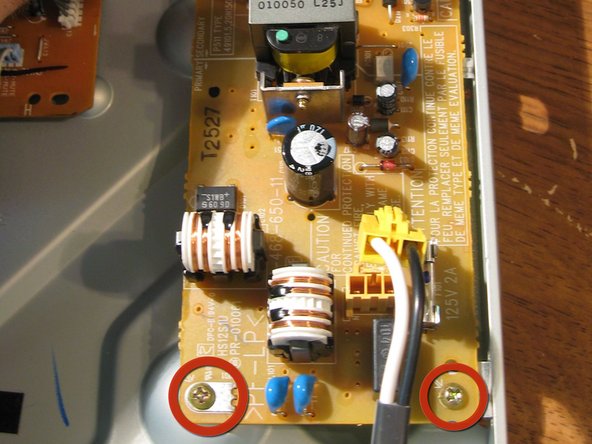
- Then remove the Four Screws (labeled in Red) holding the power supply to the Bottom of the unit.
- Remove power Supply Board
- Remove the single screw on the right side of the LCD Board. (labeled in Yellow, We will remove the rest later in the teardown.
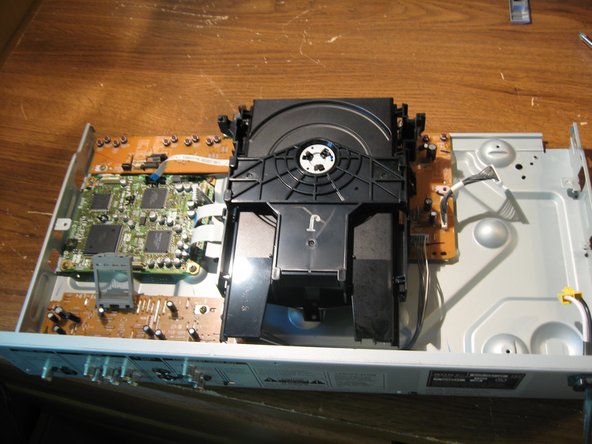
- There are three screws holding the Tray down to the bottom of the unit- Remove them
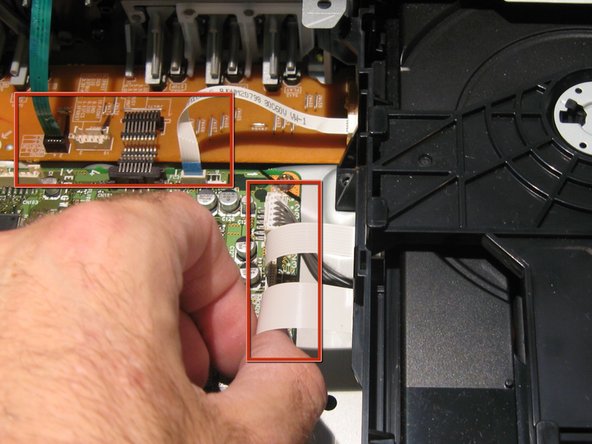
- Gently remove all connectors (6) in the image highlighted with red boxes
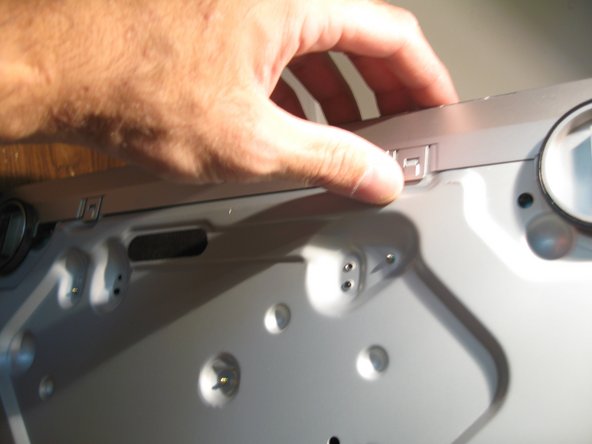
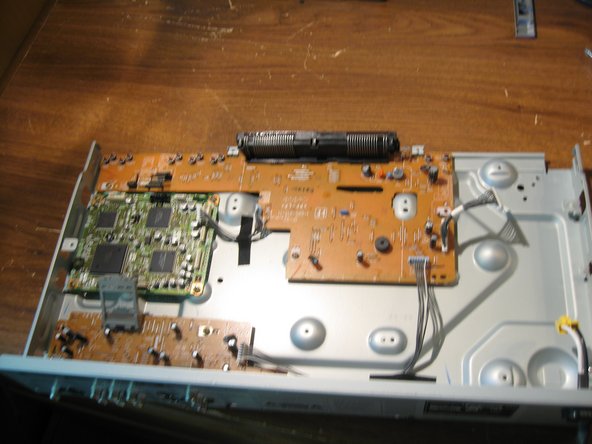
- Turn the unit over. release the two clips on the underside and then the two on either side of the unit in order to Remove the Front Face.
- Unscrew the two screws on either side of the cd tray Retaining mount.
- Remove Cd Tray.
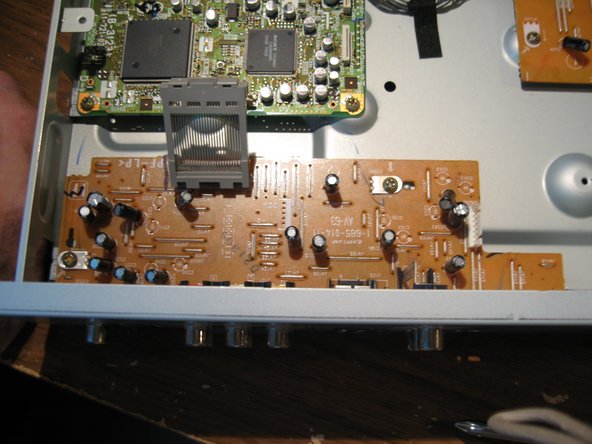
- Unattach the two connectors (labeled in Black) From the I/O Board.
- The one on the left prys open and has a little spring action. The one othe right is simply a power connector.
- In order to remove the I/O Board you are going to go to the back of the unit and remove the six (labeled in red) Screws.
- I found it interesting that there are so many screws on this part of the assembly. My guess is that Sony thinks that this is where A) the cables get connected and you want a secure connection and/or B)Being that other devices are to be hooked intt this device if anything where to be dropped off a Tv of Entertainment unit this part of the device would stand a better chance of not getting damaged. I have seen that before, Twisted RCA connectors that don't work anymore.
- Now remove the Input/Output Board being careful with the connectors and the switch on the lower right
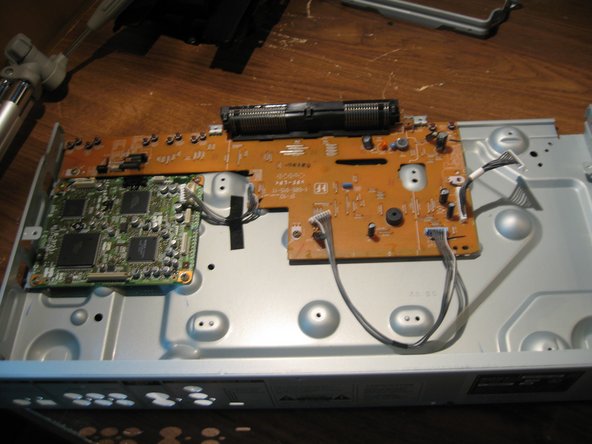
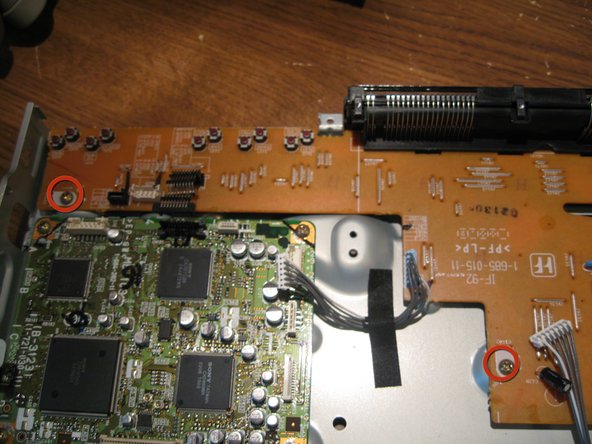
- This is the Processing Board. It is directly connected to the I/O Board and to the Front panel/LCD board. I looked up a couple of the IC's and found that the one on the top right is a MPEG-Chip. Then the Small top left IC is a 32bit microcontroller. Couldn't find any more without having to hunt down Datasheets.
- Unscrew the four screws (Circled in red) in order to remove the Processing board.
- Then the remaining two from the Front Pane/ LCD Board.
- The Rear panel can be removed if needed i have circled in this last picture as to where they were located.
- Besides the case and cd/ tray at the top of the last picture there is the LCD board , the Processing Board, The I/O Board and the Power supply (in Counterclockwise)And that is a completely dis-assembled Sony DVD Player.